


This scarf is easy enough for a very beginner to crochet. When you use a multicolor yarn, the color pattern is created for you while you make easy single crochet stitches. Multicolor yarns vary in the length of each color between color changes so using a different multicolor yarn can create a whole different color patterning as you crochet rows in single crochet. It can be fascinating to watch the color pattern emerge as you crochet.
If you're new to crochet, a scarf might seem far out of your range of talent. However, you can easily make a simple scarf with just a few basic crochet techniques. This is a great beginner's project that will help you to master chaining, the double crochet stitch, and finishing a scarf.
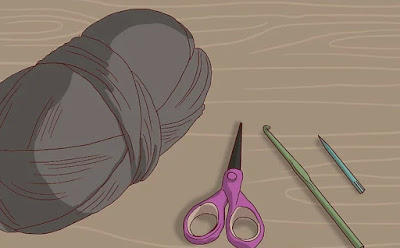 1. Gather your supplies. Making a simple scarf is easy and you only need a few items to do it. To make a simple scarf, you will need:
If you're new to crochet, a scarf might seem far out of your range of talent. However, you can easily make a simple scarf with just a few basic crochet techniques. This is a great beginner's project that will help you to master chaining, the double crochet stitch, and finishing a scarf.
How To Making Simple Scarf

- At least 200 yards (180 m) of a worsted-weight yarn
- A crochet hook in a size that is appropriate for your yarn. Check the yarn label to find the recommended hook size.
- Scissors A darning needle or plastic crochet needle to finish off the scarf at the end.

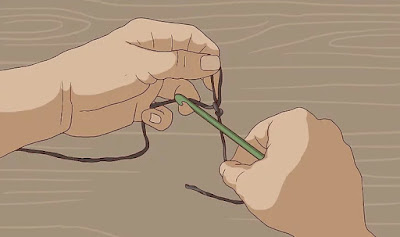
2. Make the first loop. To create the start of your foundation row, you’ll have to create a slipknot to slide onto the crochet hook. To do this:
- Wrap the end of the yarn (several inches from the tip) around your left index finger in a loop.
- At the top of your finger/loop, you should tuck the center section of the yarn in a 2nd loop through the first.
- Slide this off of your finger, and tug on the top loop that you just slid through in order to tighten the slipknot.
- Place the knot on the end of your crochet hook, and adjust it by pulling the strings to tighten/loosen the knot.

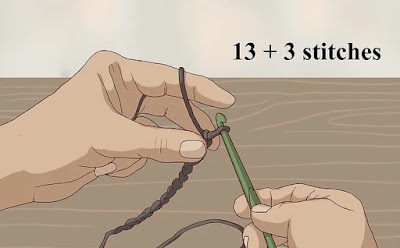
3. Chain 13 plus three stitches. To make a chain, loop the working end of the yarn over your hook in front of the slipknot. Then, pull this yarn through the slipknot to make your first chain. Chain 13 stitches and then chain three more for a total of 16 stitches.

- The extra three stitches will be your turning chain. These stitches provide some slack to start the new row. You will need to chain three before each new row for the entire scarf.
- Be careful not to make the chain links too tight or too loose. Try to keep them all at about the same size and tension.

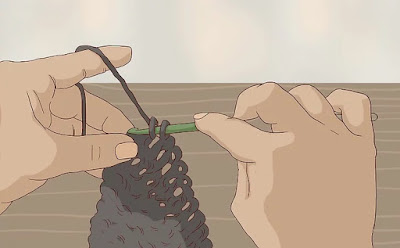
4. Do double crochet stitches for the first row. After you have your chain of 13 plus three, count back from the hook to the fifth chain from the hook. Then, double crochet into this chain.
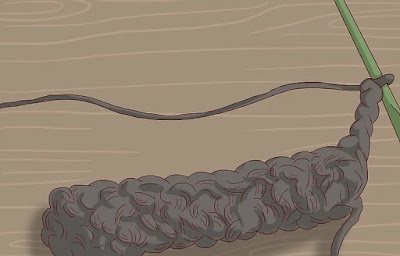
- To double crochet, loop the yarn over the hook, and then insert the hook into the chain. Then, yarn over again and pull the yarn through the first stitch. Then, yarn over again and pull through two stitches. Then, yarn over again and pull through the remaining two stitches. This will complete your first double crochet stitch.
- Continue to double crochet to the end of the row.

5. Chain three, skip one, and double crochet. For the second row, you will need to chain three again for your turning chain, then skip the first stitch, and then double crochet. Continue to double crochet to the end of the row.
- Repeat the same sequence for the next row and all rows after until the scarf is the length you want it to be.

6. Finish the scarf. After your scarf is the length you want it to be, you will need to finish it off. To finish the scarf, complete the last double crochet stitch, and then pull the loop to widen it so that it is at least a few inches long. Cut the loop in the center, and then pull out the cut yarn attached to the skein (ball of yarn). Then, pull the tail to tighten the knot that this will create.
- You can also tie a second knot through the last stitch to secure the tail even more.
- To hide the tail, thread the yarn through the darning or crochet needle and then weave it into the edge of the scarf. When you get close to the end of the tail, tie the yarn through another stitch to secure it and trim off the excess.
